Thursday, June 13, 2013

Kitchen Built-in

A few weeks ago on Facebook I mentioned that I was cutting a hole in the wall. This wall to be precise:
 

I've admired shelves/built-ins that are built between the studs in a wall for a really long time and I've always wanted to attempt it, I just wasn't sure where.  This wall in my kitchen has driven me nuts since we moved in. There's a heating vent on the floor as well as a light switch there in the middle. See that baker's rack back there? That was my latest attempt at using the space but it cut down the walking space. This is the main thoroughfare to the laundry room and the door that will soon lead to the garage, so walking space is important.

 So I cut the hole. Cut through the dry wall on both sides of the wall above the furnace so my shelves could go just a little deeper. Oh and I had to remove a stud and move the outlet and the light switch. Erik re-wired the light switch for me. I probably could have figured it out but I really didn't want to. I've got a great husband.
 Then I built these "bins" based on this tutorial at Remodelaholic.com
 Finally, yesterday I built the shelves and finished up the trim this afternoon.  Now I just have to decide if I need to paint it.  I almost want to paint the trim white to match the rest of the trim in the house, but I also like how the wood kind of matches my kitchen cabinets.

Any finishing suggestions?

Wednesday, May 15, 2013

Girls' Room

The girls' room is finally done. 
It's only been waiting on the lights in the canopies and the stairs to Hannah's bed. 
Okay, I probably should paint the stairs but I don't know when or if that will happen. 
I really love how it turned out and now the boys are whining that the girls' room is cooler. 
Um...boys...you have a loft bed, it's not cooler, it's just newer. 
 
I had to "custom" make the beds because the room is just inches shy of being large enough for this configuration. Hannah's bed (the higher one) hangs about an inch or so over the end and Marilyn has a foam mattress that squishes just enough to be narrow enough. 

The canopies are upside-down drawers that came out of a house that Erik is working on. I painted and stenciled them and the curtains are hung on ropes and hooks mounted inside. 
The lights are pendant light kits from Ikea and I picked up cord switches at my local hardware store. 
I am now bribing my girls with miniature tea-sets that I collected when I was younger; if they keep their room clean for a week they get to take their pick. 
I hope it works.

Thursday, April 11, 2013

New Bed

Let's see if I remember how to do this blogging thing.
 My fingers have been silent lately when it comes to my blog. Life has been happening since last I blogged. A baby has been born (totally meant to blog about that, he's now 6 months old and getting his first tooth), and a new routine of life has slowly emerged. Home-schooling has continued on (only 5 more solid weeks and then random days of finishing up loose ends!) Projects have been dreamed, planned and brought to completion.
And that's why I'm here today.
My husband said I should blog it.
A few weeks ago I gave away my headboard and sold the girls' bunkbeds. I built them new ones (just a few finishing touches and then I'll share that project as well) using some of the lumber from our old bed but our mattress has been on the floor while I finished up my plan and finagled the monies out of the budget to buy 2 sheets of plywood. 
While Hannah was at violin lessons on Tuesday I took the other kiddos to the lumber yard and put in my "order". I love Nehalem Lumber, they delivered my two sheets of plywood for me later that afternoon. Nehalem Lumber is the only place we have a tab and we have one every month.
After a couple of false starts with a jigsaw and the skillsaw with the rusty blade I gave up and waited until Erik got home from work so I could use his nice skillsaw.

Late Tuesday night we climbed into an actual bed that I built all by myself!
So I know it doesn't look like much but it's not suppose to.  It's a really basic platform bed with storage boxes around the edge and just enough of a headboard to keep the pillows from falling off.
Based off of plans from AnaWhite
 These are my plans. The boxes at the foot of the bed I made in two sections so I could get away with only using 2 sheets of plywood instead of 3. I ended up making the headboard a little lower than the drawing because our bed is in front of the window and I wanted as much light as possible.

The boxes are set back about an inch all the way around so we don't bang our shins on the corners of the bed. This was a serious problem with our last bed.


 My deluxe Scrabble board (the one with a turn table) now has a home other than the linen closet!
 
Anyone want to come play Scrabble?

My next major project is built in bookcases and a window seat around our living room window:

 Though I suppose I should finish up the girls' room first.

Tuesday, September 18, 2012

Boys' Room Reveal

For about the past month the boys have been sleeping in the living room and I've been moving their mattresses back and forth from my room twice a day.

Why?

Oh- 'cause I got this crazy idea that there was a lot of wasted space in their bedroom up near the ceiling and decided they needed a bed-loft, demolished the top half of their closet and turned their room into a construction zone.

Random piece of advice: when you take down or demolish drywall, please cover the carpet with something, anything or you will be vacuuming drywall dust and pieces out of your carpet for pretty much the rest of your life or until you replace the carpet.

Sunday night was their first night back in their room and they were thrilled. And I'm thrilled (I have my living room back!) and it turned out so cool.

First though, a history of this bedroom.

When we moved in, I had an affinity for painted stripes and bright colors.

A little later the room was painted all yellow (sorry, couldn't find a picture but it's the same yellow as above only all over).

Little kids, who shall remain nameless, decided to draw all over their walls, so I went with the easiest fix (and liking to paint and wanting a change); I let the kids pick the wall color.

They chose "Spring Leaf Green".  Oh my was it bright.

Other little kids, younger siblings of kids that shall remain nameless, also decided to draw all over the walls; we went back to yellow and yellow it stayed until "Momma got her crazy idea".

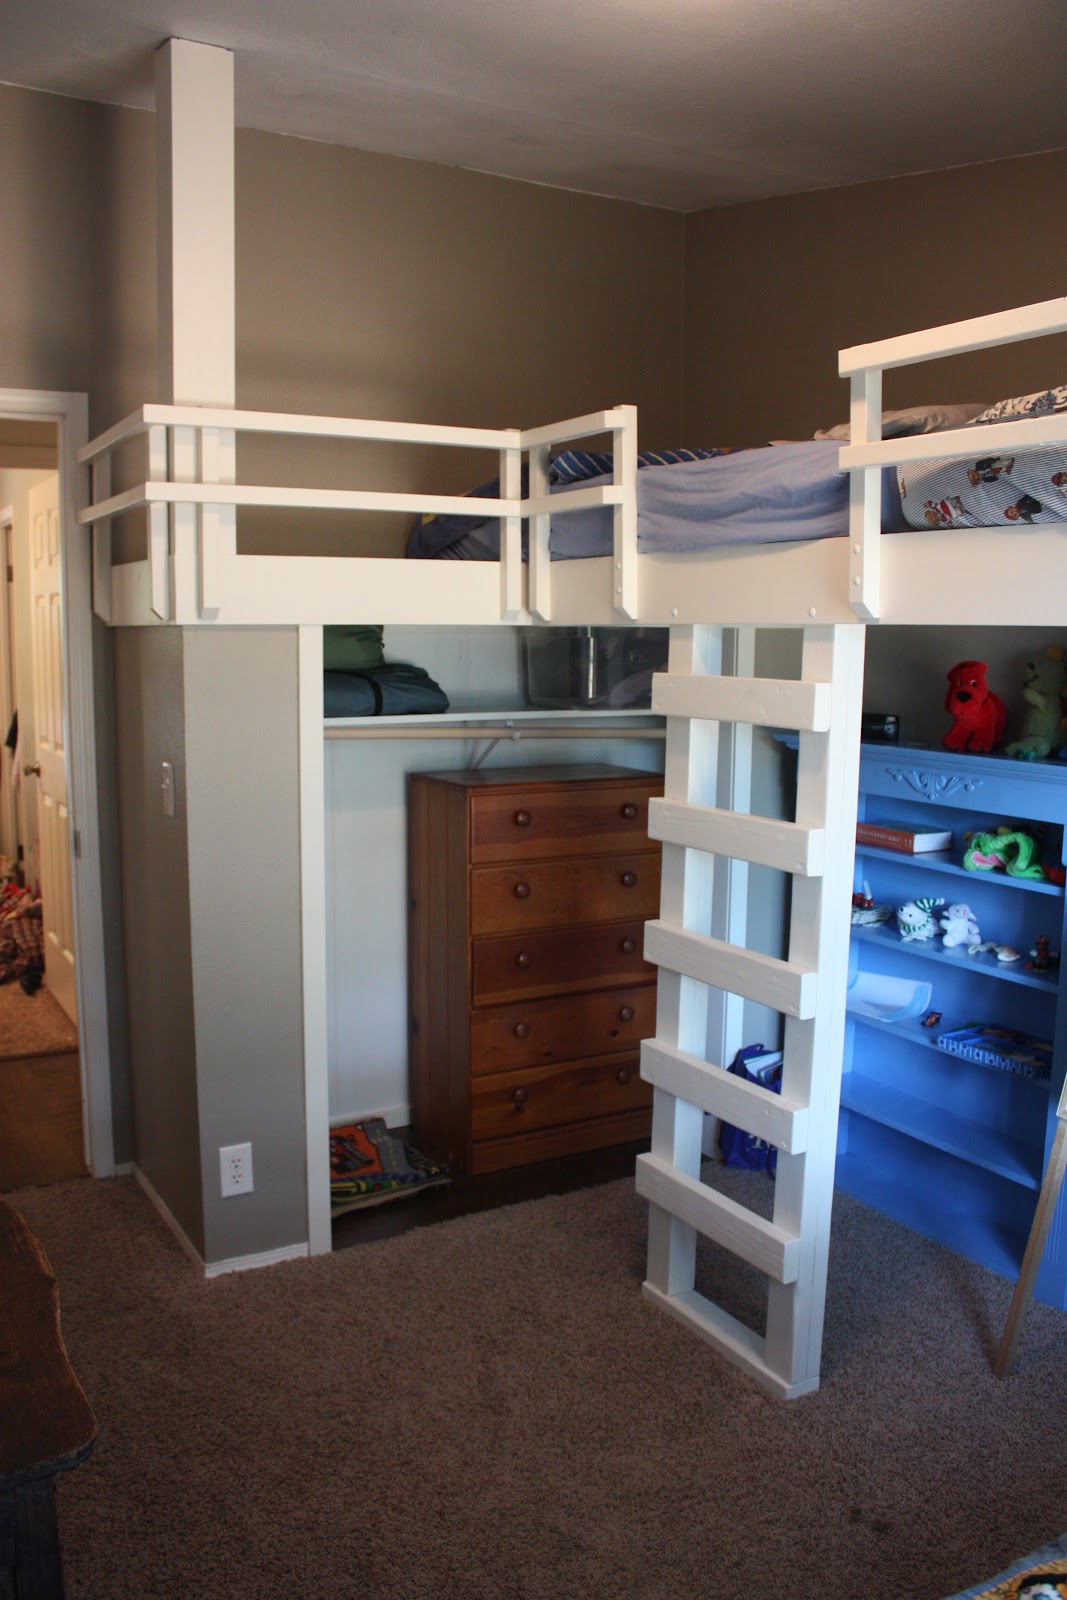
Their room is now grey, I'm hoping it hides pencil marks and dirt a lot better. Not only is it grey though, it has one of the coolest bed-lofts ever.

 View from the door:

 Two twin mattresses fit end to end along the wall and the twin bed on the ground has a trundle bed underneath it as well so we have room for grandparents or guests.

 And still room to play and keep things organized.

I just have to brag that I have a wonderful husband who puts up with my crazy ideas, acts as a consultant to my limited, though growing, construction knowledge, helps out on occasion and does not run from the house when I tell him I have another idea. I am so very thankful for him.

Now I just need my own set of tools. : )

Saturday, July 21, 2012

Confessions


It's been a year.

Actually it's been 12 days over a year.

Since what?

Since I decided that for one year I would not buy myself any clothes.

I decided that I would make do or do without.

And I'd say that overall it was a success.

But here are my confessions; my failures if you will.

Three items in which my money exchanged hands for clothing articles for myself.

And as anyone can guess, I have my excuses.

First Failure Item: White Shoes
   I found these at a garage sale for $1 about two weeks after I started this challenge.  Two weeks in and I failed, but seriously, how often do you find brand new shoes in women's size 10 for $1!  Some deals are way too good to pass up.

Second Failure Item:  Purple Maternity Shirt
   Goodwill purchase at the end of February not long after finding out that baby number 5 was on it's way. It was on sale for $2.50.

Third Failure Item: Grey Athleta Skirt
   Garage Sale purchase in June. $1.  I've gotten the Athleta catalog in the mail before, this is a $30 skirt and I've worn it at least twice a week since I purchased it.  I think comfy skirts are a must when you're pregnant and I was lacking in the comfy skirt department.

The total for my failures is $4.50.  Not bad for a year.

So how did I make it? Well, luckily I have two sisters that give me hand-me-downs and buy me clothes for Christmas and my birthday.  I also asked Erik for a sweatshirt for Christmas and I did end up making myself a few things from fabric in my craft closet.

And it helped that I got pregnant in January and I've been able to dig out my tub of maternity clothes; it's like a whole new wardrobe!

So am I desperate to go on a shopping spree?

Nope.

Still don't have the money to do that, and I've learned that I can be creative if there's something lacking in my wardrobe. Though the last dress I tried to make didn't end up turning out like I planned so I may be searching for a comfy maxi dress....they've got some great maternity ones at Old Navy. :)

Tuesday, July 17, 2012

"We Can Fold All Our Clothes!"

 Hannah is very excited to have a place other than a laundry basket on the floor to put all her clothes.

A month ago or so my mother in law sent us a little money to find a dresser for the girls' room. So I've been scouring craigslist and garage sales and Cart'm. Cart'm came through again.

Found this beauty last Friday and put a hold on it, then changed my mind and called and had them take the hold off but I kept thinking about it this weekend and so I dragged the kids there when they opened Monday morning, praying that it would still be there.

It was, and it was only $20.

Next stop, the fabulous Salt and Paper in Manzanita for a roll of fun wrapping paper (inspiration from this blog and this one), then a dig through the leftover paint in the shed. I used the same paint that's on the wall in the girls' room; "Australian Morning", or as Hannah was describing it to our neighbor Karen, "It's like the color of your foundation only not dirty."  (it's a gray/green).

A little Modge Podge to put the wrapping paper on the drawers and voila!
An adorable dresser for the girls for just under $25.

If Marilyn finds a marker and draws on it I might cry.

Saturday, June 30, 2012

Chicken Coop

 The chicken coop is finally done! Painted and run enclosed completely. And there are chicks in there!

 These big doors on the front open all the way up for ease of cleaning. And the little door is for everyday use by the chick-a-lickies (as Marilyn calls them).
 We've got Australorps, Buff Orpingtons and Reds. Seeing as we can't tell each bird apart, all the blacks are "Blackberry", all the reds are "Cinnamon" and all the Yellows are "Honey".
They've hit their awkward stage.
They have yet to venture down the ramp but they sure like to crowd around the open door. The Australorps...Blackberries...seem to be the most adventuresome so I'm betting they'll be the first ones out.